Showing posts with label gold. Show all posts

THINGS I AM LOVING..

Christmas festivities are all around us! I have yet to put up the tree or even start any decoration. I finally got a minute to relax and breathe today after our travels and moving into a new place, so I decided share with you some of my favorite items right now!
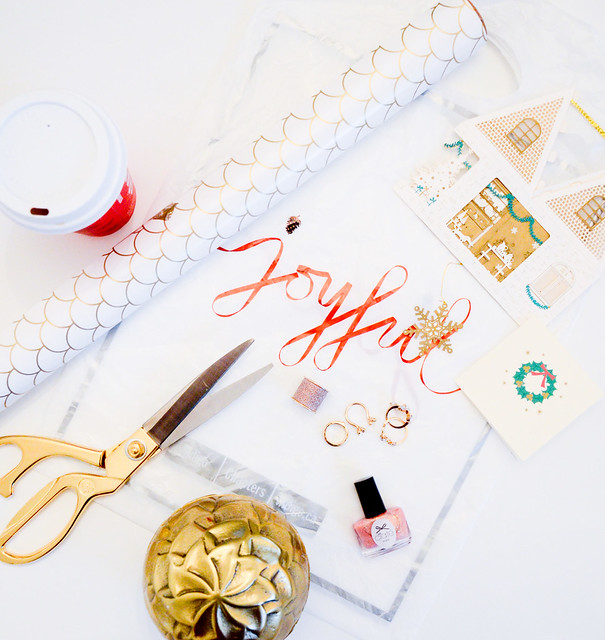
christmasdecordiy 004

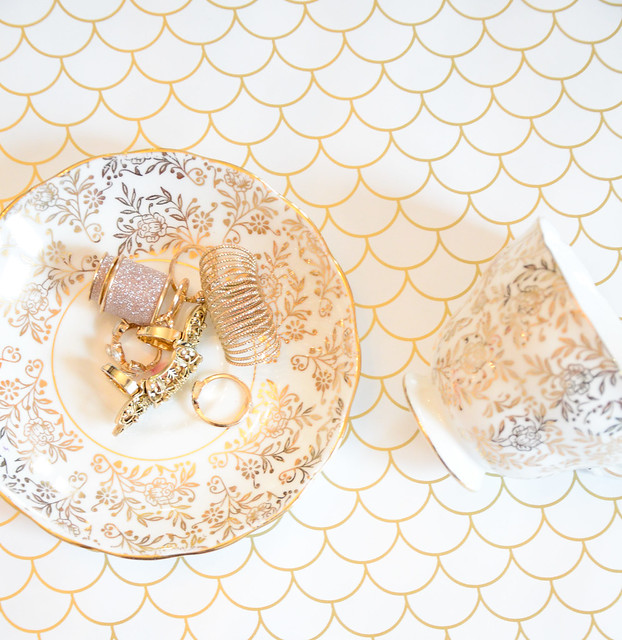
Okay, can I just say Michaels just killed it with the wrapping paper selection this year! I found the scalloped white and gold paper (seen above) for $3.00! 

Metal Feather sphere box, by Nate Berkus for Target
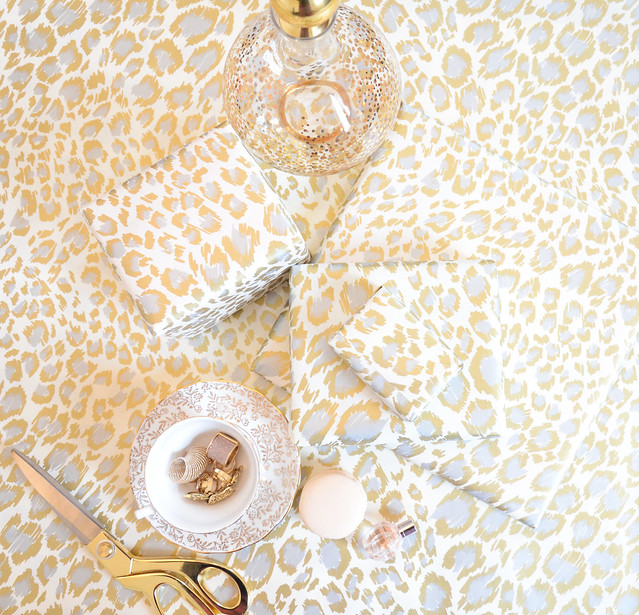
white and gold leapord print wrapping paper

Clearly gold is the colour of the season, and Homesense has a great variety like this gold and silver leopard print..and it is a very stuydy paper, I already have a few DIYs planned for this one!

Gold scissors by Nate Berkus for Target. Not only do they look great, the size is perfect for cutting lots and lots of wrapping paper!
christmasdecordiy 014

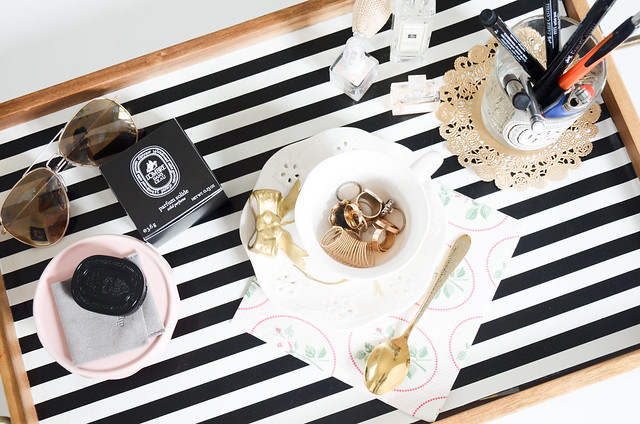
A vintage Tea cup. People that love their teacups understand the value of a vintage one! I found this lovely teacup (of course white and gold) at the Toronto Distillery District vintage shop across from El Cantrin. If you live in Toronto, this place is a must visit and very affordable!
christmasdecordiy 021

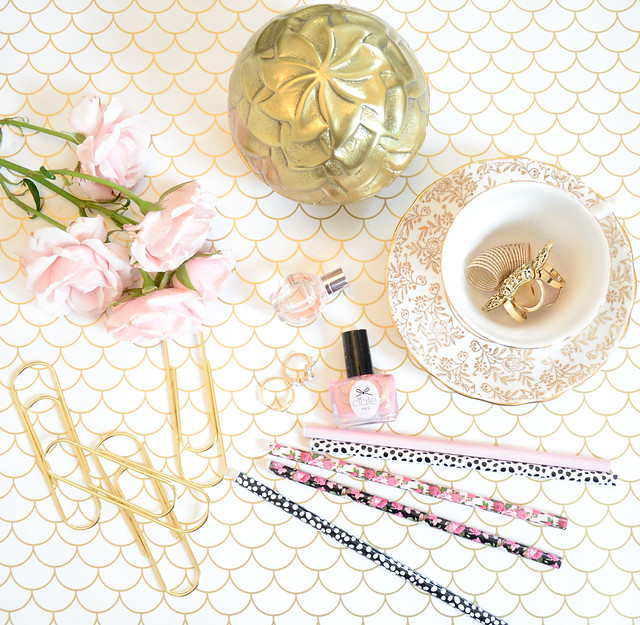
Ciate glitter nailpolish, it is pink and with gold glitter..enough said!

Colourful floral pencils from HM

Large finger Rings from HM

Over-sized paperclips, not only great for holiday madness but a great gift for anyone who loves stationery
christmasdecordiy 025

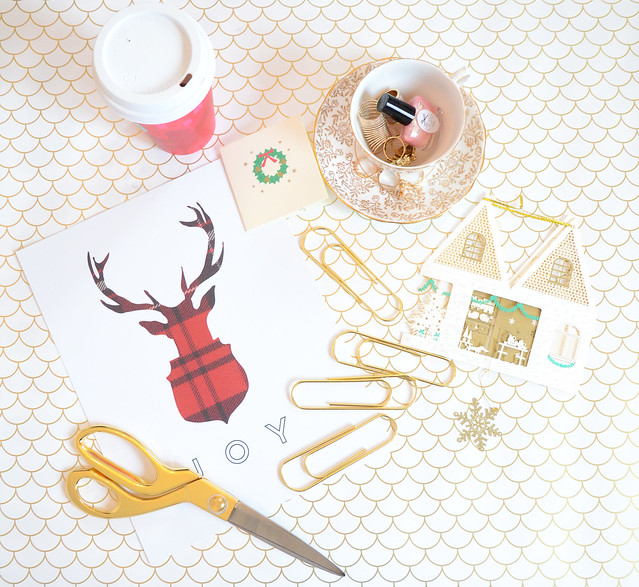
Christmas card that doubles as a 3D hanging ornament by Papyrus from Chapters-Indigo

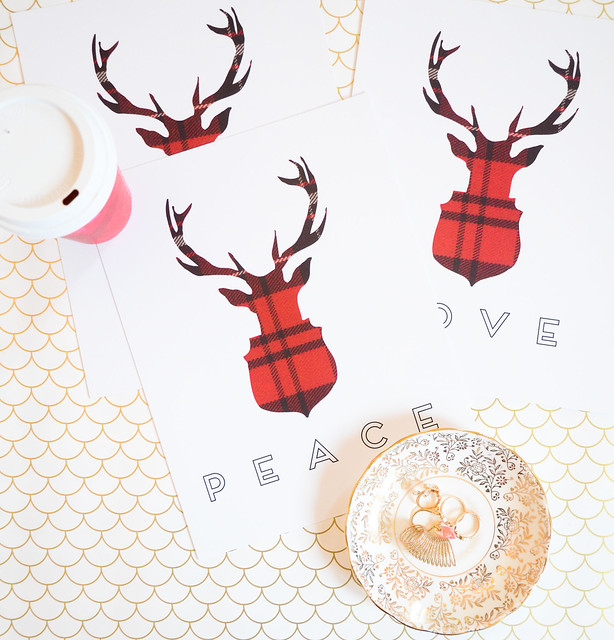
Reindeer prints by SSprint shop, also available at Chapters-Indigo
christmas decor

And last but not the least no holiday season is complete without the Red cups from Starbucks!

DIY: OMBRE SALT & PEPPER PINECONE SHAKER


DIY rustic ombre gold pinecone salt shaker for the holidays

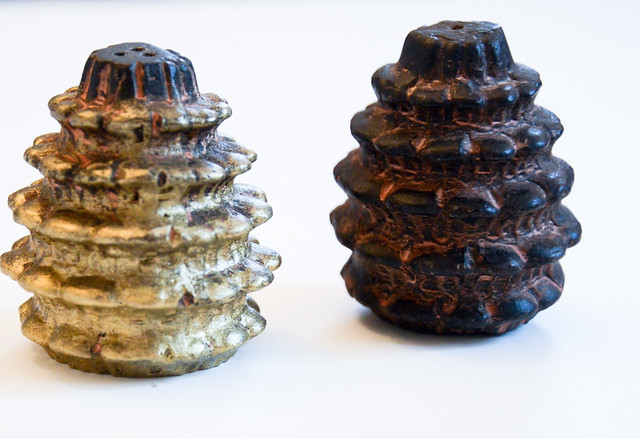
Hello lovelies! It has been a while since my last DIY, so here's an easy festive one! I got these pine cone Salt and Pepper shaker from Chapters-Indigo (on sale now!). So I scored them 50% off! I liked the original rustic look of them, but for some reason I was itching to paint them another colour. I did, however, enjoyed the details on the shakers so I decided to give it an ombre look. I also didn't want to paint the part where salt/pepper would come in contact with paint (as this might not the healthy!), so this ombre look allows us to leave the top completely contact free with the paint. So let's get started!
DIY rustic ombre gold pinecone salt shaker for the holidays

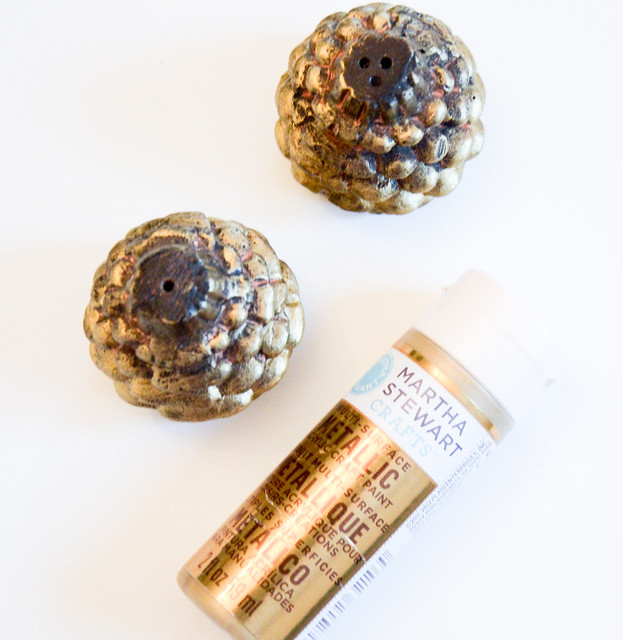
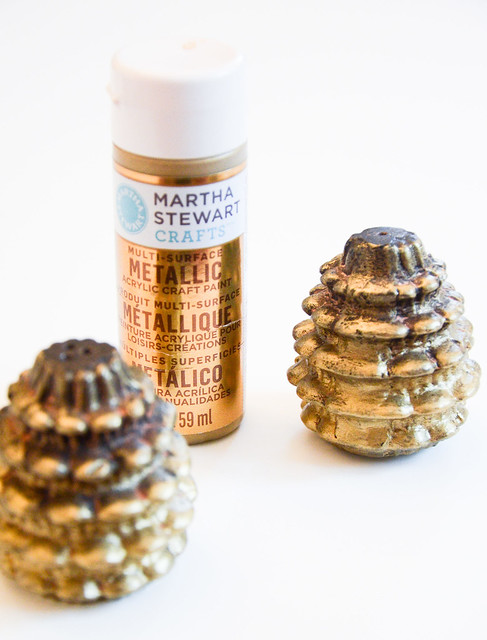
All you need is a metallic gold paint. I used this one from Martha Stewart from Michaels. It is easy to use, dries very quickly and works on any surface! (I also don't intend to use these shakers all year around, so I didn't need anything too durable)

I divided the shaker into three parts. Details below.

DIY rustic ombre gold pinecone salt shaker for the holidays

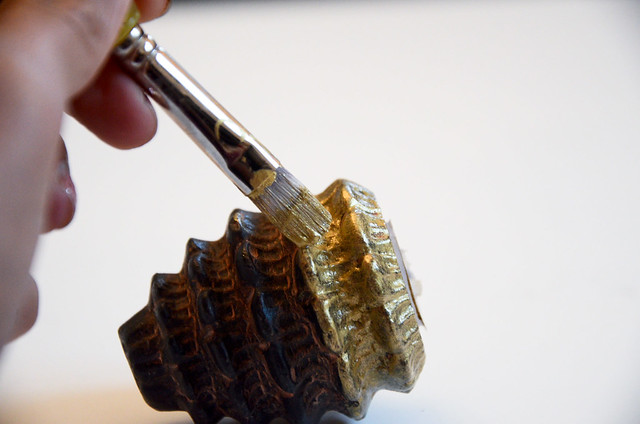
Bottom third: Using a medium sized brush, start at the bottom of the shaker. Make sure to give it a few coats for darker ombre bottom.

DIY rustic ombre gold pinecone salt shaker for the holidays

Make sure to get into all the ridges and completely cover the bottom third of the shaker. 

DIY rustic ombre gold pinecone salt shaker for the holidays

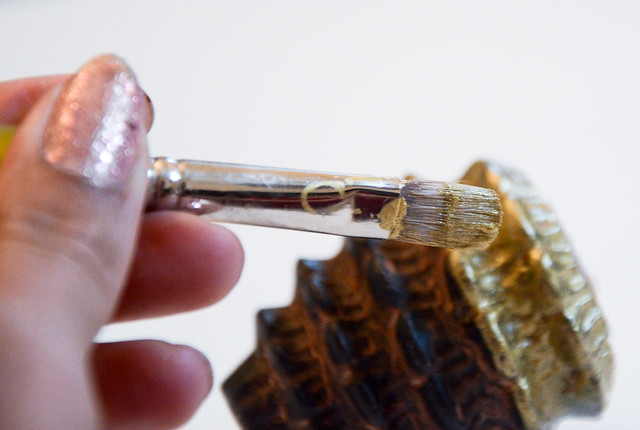
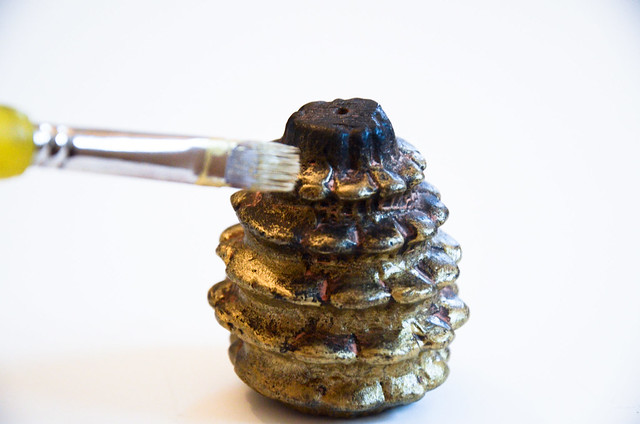
Middle: This is when it get a little tricky. Notice how dry the brush is. Dip it lightly in the paint and brush off the access on a piece of paper, so you have minimum amount of paint on the brush. Then just light brush the shaker, leaving the nooks and ridges showing the rustic brown underneath.

DIY rustic ombre gold pinecone salt shaker for the holidays

Top third: Now having almost no paint at all on the brush, working with the residual paint from before brush the top. If you need to go over it again, dip in paint, paint over the bottom first and then use the dry brush to lightly cover the top third. 
It is all sounds complicated..but hey if you mess up just pain the whole thing gold and have a glamorous shaker for the holidays!

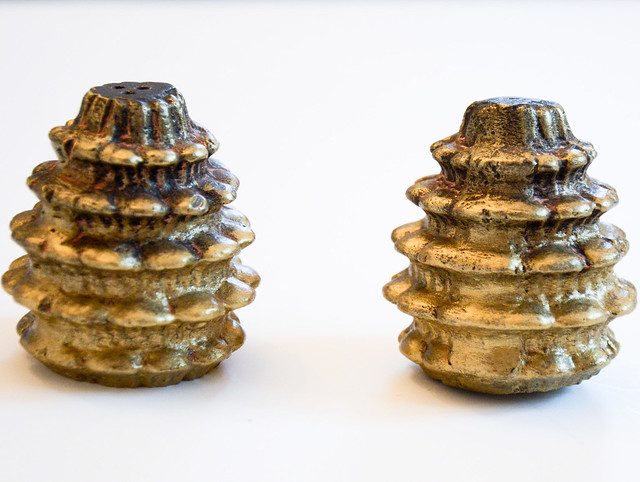
DIY rustic ombre gold pinecone salt shaker for the holidays

Easy as that! Hope you enjoyed this quick and easy DIY. I have another DIY all ready to go, can't wait to share that with you guys soon!

~Nav

HOW I STYLED MY LOUIS GHOST CHAIR FROM STRUCTUBE

Hello Lovelies! I had the pleasure to go the BlogPodium this year, a great conference for Canadian bloggers! I got to meet some amazing bloggers, and learned about the business side of blogging. Best of all, I met some great sponsors! One of which is Structube. Structube gave away two styles of chairs to the bloggers, and I naturally picked the "Modern Romantic" style for myself. I have been in love with this chair since I first saw it in a Sex and the City episode in season 6 (shot in Paris), so naturally I was thrilled to have finally gotten my hands on one! Since picking it up from their Liberty Village location in Toronto, I have been busy styling it, and here I show you how I styled my Luxe chair.


White and gold home decor with Louis Ghost chair from structube

Painting my room white was the best thing I have ever done! It is a blank canvas that really makes the accessories pop. I have never been able to commit to one metal, so I blatantly mix gold and silver, and with enough repetition you can make this concept work very well. My room is slowly turning into the romantic oasis I have always dreamed of.

White and gold home decor with Louis Ghost chair from structube
First, I decided on my themes and then chose objects that fit more than one theme. My themes for my bedroom are Travel, Gold&White, Feminine. I then broke down each accessory into a theme:
Travel: Eiffel tower + Sea shells + Paris books
Gold: Sea shells + Decanter + Gold dot book cover + Tea cup
Feminine: Tea cup + pretty books + curvy lines
More details below.


White and gold home decor with Louis Ghost chair from structube
Nothing says glamor like a crystal chandelier, from Home Depot!

White and gold home decor with Louis Ghost chair from structube

The Gold sea urchin metallic wall hangings are from Target, spray painted gold against to match the decor. With so much gold in accessories, it is nice to break it up with cool silver. You don't want too much matchy-matchy. 
Table top acessories: I purchased the side table from Homesense (similar at Westelm). Eiffel tower from Paris (of course), Gold seashells from Costa Rica I spray painted myself placed in champagne glass from Chapters-Indigo. Gold decanter also from Chapters-Indigo (holiday collection from last year). Books are also from Chapters-Indigo, clearly all things French! I topped it with tea cup I purchased from Homesense and did a little DIY with gold sharpie.


White and gold home decor with Louis Ghost chair from structube

This goes to show you don't need to spend a lot of money to make a space look luxurious. Little bit of paint, and an eclectic mix of pieces can really tie a place together as long as you have a theme or two. Definitely have more than one theme, it keeps the place looking more interesting and easier to shop for! With the Chair so simple and clean, I decided to keep as it is and decorate around it.

HOME DECOR: BLACK AND GOLD INSPIRATION

Even though we have summer like weather, with the arrival of September we tend to start preparing for fall. Though we have had a short summer, I am starting to get a bit excited for fall! I love it simply because it never disappoints! If it is mild, great..if it's cold then well it's fall! Along with the low expectations I love the coziness of it, the days are short but not too short (unlike Dec!), but it is nice to wear layers and sit by the fireplace.
So let's ignore the summery weather outside for a second and dream of a glamorous fall. I usually don't shop with a theme in mind, but rather discover a theme among the things I have around, and I noticed I am kind of crazy about Gold and Black!
I gathered few things around the house to show easy it is pull a theme together without having to buy everything new.

Black and gold home decor inspiration ideas

Fan- I bought from Venice a few years ago, I fell in love with the lace detail
Gold Shells - spray painted gold shells I picked up from the beach in Costa Rica
Gold Doily- an ordinary paper doily spray painted gold by yours truly
Black Rocks- another DIY by moi (posted last week)
Ampersand - a recent purchase from Chapters-Indigo (I love the simplicity of it)
Chair print- I actually purchased this print as a set of 4 from "Paris in Color" Etsy shop a few months ago. I have yet to frame them but I just love how it ties in my love for Black, Gold & Paris 

Black and gold home decor inspiration ideas

It is not that hard to bring a theme together. Chances are if you love a particular color or style you will find a few things at home already, and rest can be fixed with a spray can! And the best part of spraying anything is that you can always change it another color if you get tired of it.

Black and gold home decor inspiration ideas

Another closer look at the objects I used for this theme.  

DIY: SPRUCE UP YOUR ROCK COLLECTION WITH GOLD PAINT

I have seen some painted rock DIYs on Pinterest for a while now. I always wanted to try something like that but never found the right kind of rocks to paint. As you know I went camping last month and while up north I picked up some rocks. I tried displaying them in a vase but they just didn't look as pretty as I thought they would..so naturally I think of painting yet another thing gold! This time however it look a little more than 10 mins, but my material list is short as ever!

Easy DIY - How to spruce up you rock collections: Paint rocks gold in geometric pattern for a modern decor

 So let's begin with materials:

1. Paper plate, I just used some left over plates from hubby's birthday party
2. Metallic Paint: I used two colours, Martha Stewart Metallic Gold and Yellow Gold (more details below)
3: Paint brush: medium size will do
4. Tape of any kind

Easy DIY - How to spruce up you rock collections: Paint rocks gold in geometric pattern for a modern decor

On the left is "Yellow Gold" and right is "Gold"- both metallic from Michael's

Easy DIY - How to spruce up you rock collections: Paint rocks gold in geometric pattern for a modern decor

This is how they look on a plate. Notice the yellow gold looks a bit pale in comparison

Easy DIY - How to spruce up you rock collections: Paint rocks gold in geometric pattern for a modern decor

First, use the tape to make any pattern you like. I did mostly diagonal lines or triangles to give it more modern look. Masking tape might be a better choice and removing the clear tape was bit of a challenge as it was invisible!

Easy DIY - How to spruce up you rock collections: Paint rocks gold in geometric pattern for a modern decor

Since this was my first time with both paints I will show you my trial and error process as well. Top pic shows the first coat with "Yellow Gold" paint. It is a bit translucent. So I decided to use the "Gold" instead as the base coat (shown below)

Easy DIY - How to spruce up you rock collections: Paint rocks gold in geometric pattern for a modern decor

Much better result with 2 coats of  "Gold" paint.

Easy DIY - How to spruce up you rock collections: Paint rocks gold in geometric pattern for a modern decor

Once fully covered, I topped with the "Yellow Gold" to give it more shiny/blingy look

Easy DIY - How to spruce up you rock collections: Paint rocks gold in geometric pattern for a modern decor

I did try some free hand designs for the fun of it. Good thing about this project is that by the time you are done doing the first coat on all the rocks, first ones are ready for the 2nd coat so there is no wait time at all. You can tape all at once, I taped as I went along that gave more drying time for the rocks too.

Easy DIY - How to spruce up you rock collections: Paint rocks gold in geometric pattern for a modern decor
Once dried remove the tape and enjoy! How pretty are these beauties!

Chapters-Indigo Fall Favorites!

Even though we are still enjoying this beautiful summer, I can't help but get excited over all the fall inventory coming out right now! And it is no secret I am a huge Chapters-Indigo fan, so I have compiled some of my favorites from the Fall collection.

There seems to major trends this fall, Monochromatics and GOLD! I like the subtlety of the monochromatic look but I am obsessed with gold these days. And the best part is that they go beautifully together. So, there is no need to just pick one theme when you can mix and match from both. Blacks and Whites tone down the gold a little bit, and gold adds bit of glam to the simple subdued monochromatic room.


Metallics are always big around the holidays, so it is the perfect time to start with gold. But, there is no need to put it away after..gold blends beautifully in an all white room, or why not add a touch glam to every day life!


DIY: GOLD POLKA DOT BOWL

Here's another fun and easy DIY for you guys! If you have seen some of my previous DIYs, you will know that my DIYs are really more for the lazy girl, because they are so darn easy! So staying true to my lazy self, I have managed to create another simple but fun project.
It is no secret that I love Polka dots, and with gold being all the rage these days this pretty little bowl will fit right in! So let's get started.

Easy DIY - Gold sharpie polka dot white bowl

Materials:

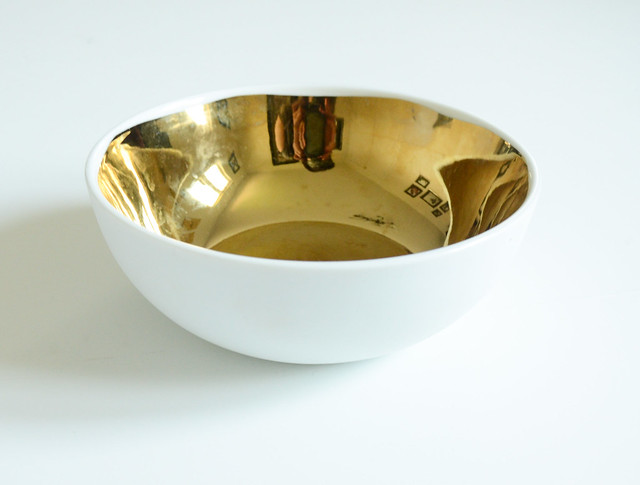
1. White ceramic bowl, or any dish- I scored mine on clearance holiday sale at Chapters-Indigo (I have seen some in the stores still!)
2. Gold oil-based Sharpie

Easy DIY - Gold sharpie polka dot white bowl

Make sure to clean the dish with soap and water.

Easy DIY - Gold sharpie polka dot white bowl

Get rid of any marks or stains

Easy DIY - Gold sharpie polka dot white bowl

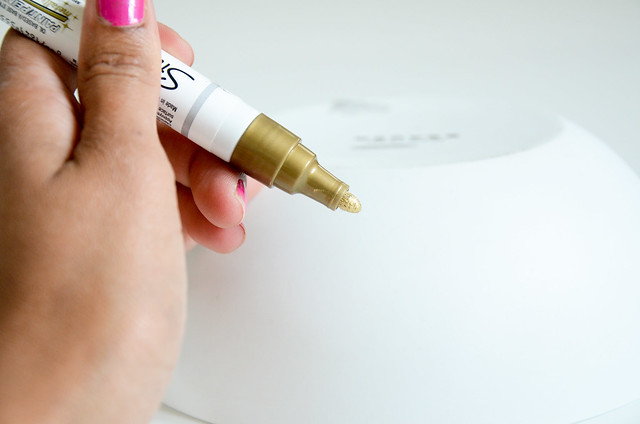
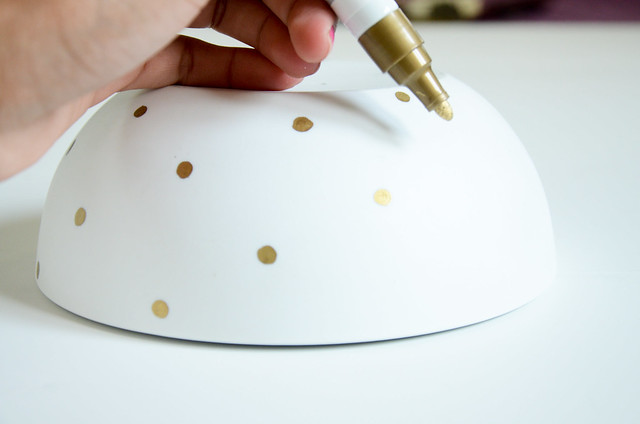
Using the Gold Sharpie just start at any point really.

Easy DIY - Gold sharpie polka dot white bowl

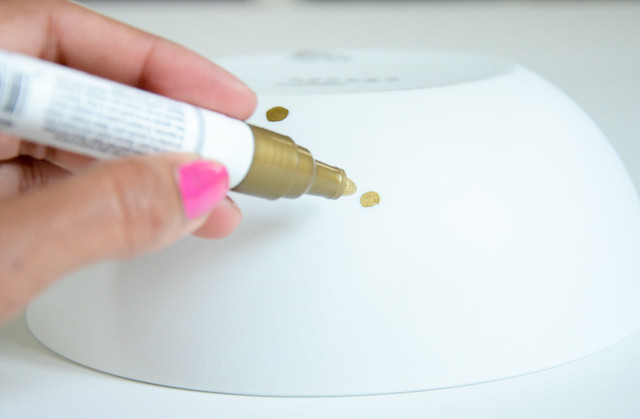
Once you have started, it is easier to go in diagonal line and place the dots about 1 inch apart

Easy DIY - Gold sharpie polka dot white bowl
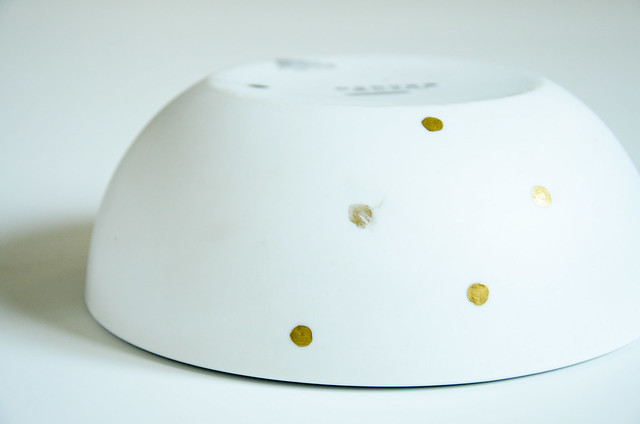
And I made a mistake! The dot wasn't fully round so I tried to wipe and it made a bigger mess.

Easy DIY - Gold sharpie polka dot white bowl

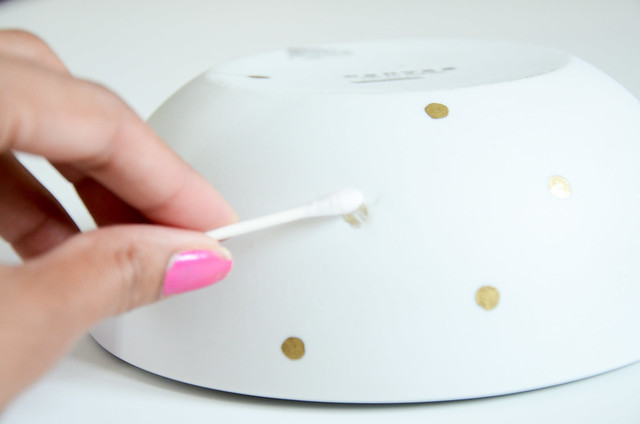
But not to worry, it came off with some nail polish remover (pls don't mind my nails)

Easy DIY - Gold sharpie polka dot white bowl

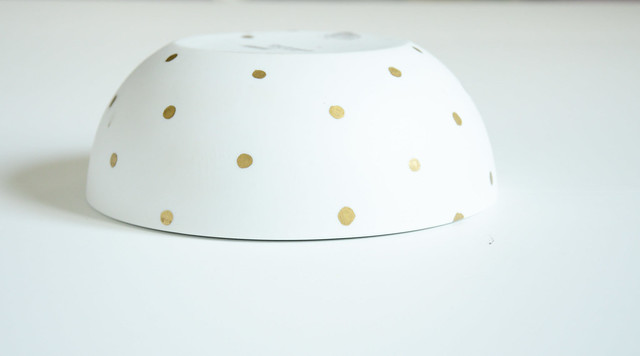
Carry on in diagonal pattern till you are fully done

Easy DIY - Gold sharpie polka dot white bowl

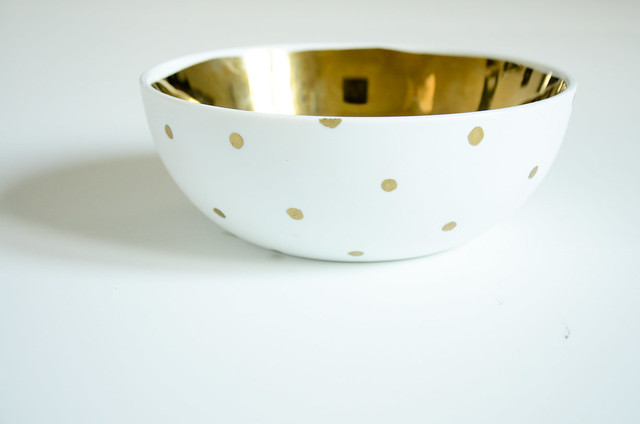
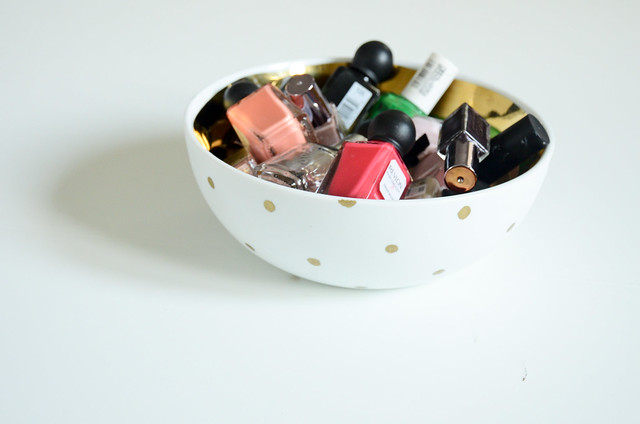
And..Voila! It took be less than 10 mins really. I don't intend to use this bowl for food I am going to stop right here. But if you intend to wash it regularly, make sure to bake it in the oven for 30 mins at 350 deg.

Easy DIY - Gold sharpie polka dot white bowl

DIY: PAINT WHITE CHINA TEACUP WITH GOLD SHARPIE

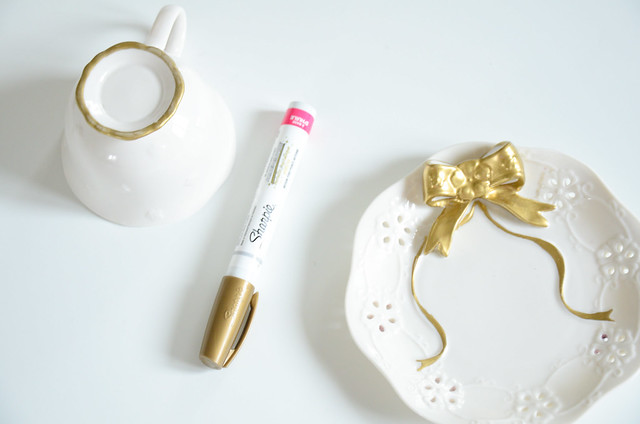
Here is another fun and of course EASY DIY. As you may have noticed I don't like to overly complicate things, and I usually look at the amount of time and materials needed, and see if it is worth doing it myself or just buy! So here is another DIY which requires only 2 things!

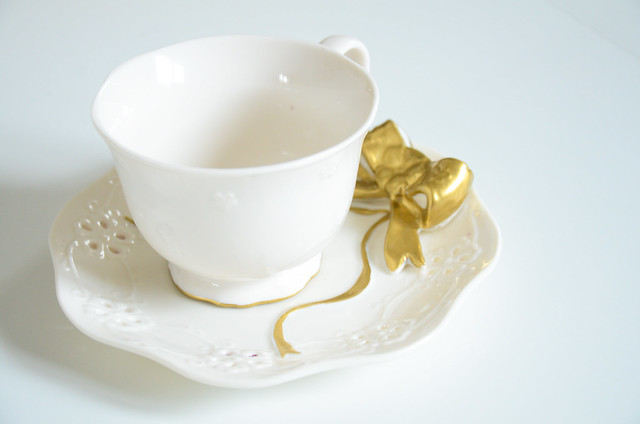
Gold Paint sharpie DIY on a tea cup and pretty gold bow


Inspired by this post I found on Pinterest, I decided to give it a shot and create a mini DIY.
gold sharpie, bake at 350 for 30 min and let cool in oven. Totally want to do this 
Materials:
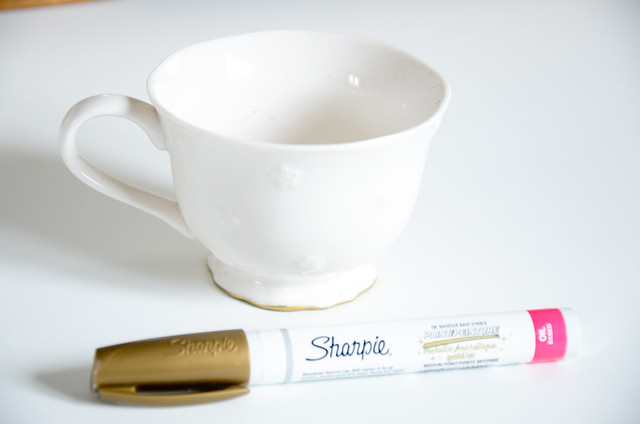
1. Cup/Mug/Glass of your choice
2. Gold oil Paint Sharpie-make sure it is OIL based not water (from Michaels)
3. Oven (optional) 
4. Nailpolish remover/cotton swab (optional)

Gold Paint sharpie DIY on a tea cup and pretty gold bow

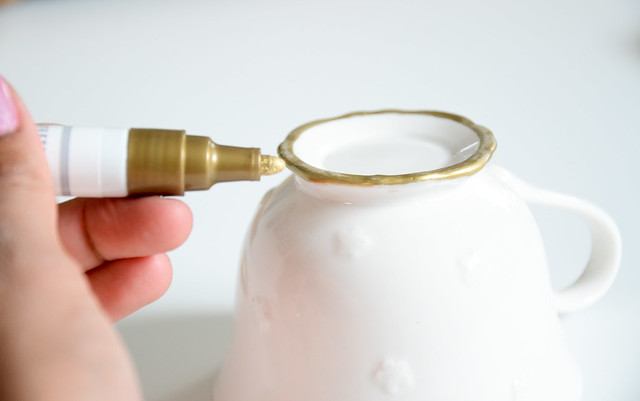
Gold Paint sharpie DIY on a tea cup and pretty gold bow

So I started with just doing the bottom rim of the cup, and moved over the more fun part, the saucer! 

TIP: If you mess up, just clean it which a cotton swab and nail polish remover. You don't even have to do it right away, if you change your mind even the next day it will come right off with the remover.

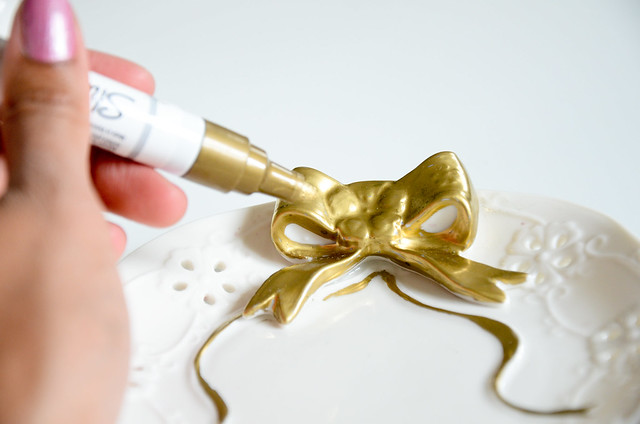
Gold Paint sharpie DIY on a tea cup and pretty gold bow

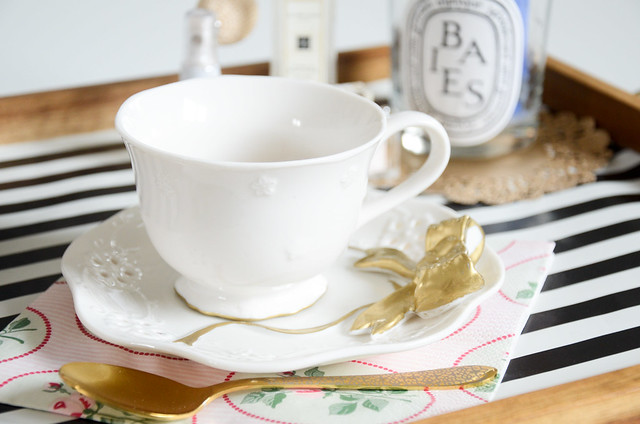
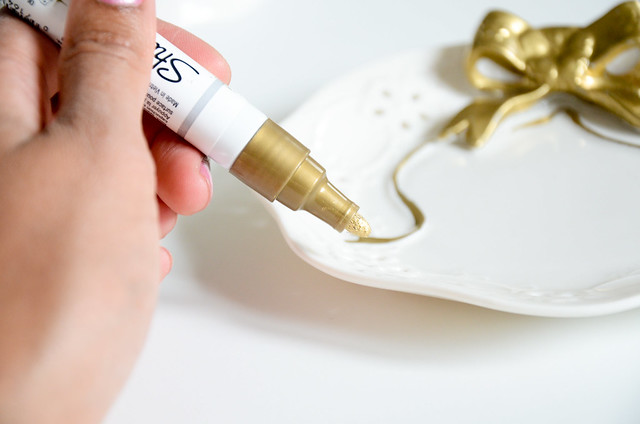
I bought this set just because of this cute bow, even in white it looked fine but why not embellish it a little right!

Gold Paint sharpie DIY on a tea cup and pretty gold bow

And there you go, all done!
Now you can stop here and use this as a decorative object, but if you intend to use and wash it regularly, make sure to Bake it in the oven.
Recommended time is 30 mins at 350 deg. 

TIP: make sure you place the objects as the oven is warming up, so the china/glass doesn't get temperature shock and shatter into pieces! Also, do the same once done, leave the objects in the oven as it cools. Leave the oven door cracked open for faster cooling.

Gold Paint sharpie DIY on a tea cup and pretty gold bow

Only hand wash, not dishwasher or microwave safe, but sure does look pretty!

Gold Paint sharpie DIY on a tea cup and pretty gold bow

Gold Paint sharpie DIY on a tea cup and pretty gold bow

Related Posts Plugin for WordPress, Blogger...